Saturday, February 11, 2017

Romantic Dinner Recipe Ideas: Easy Meatballs with Cream Sauce

As moms, it helps to take some time away from the children and have a romantic dinner with your significant other. If you aren't able to make it out of the house for a date (maybe because there's no extra money in the budget for a babysitter), here's one of the best ideas for romantic dinners that's easy and oh so yummy. Fix the kids some chicken nuggets and send them off to bed. Then fix this easy romantic meal for your sweetheart.


Meatballs and Cream Sauce

Ingredients:

Pkg of Premade Meatballs (your choice. I used Kirkland Signature Italian Meatballs)*
2 tablespoons butter
2 tablespoons flour
1/4 teaspoon dried thyme
salt and butter to taste
1 14-oz can chicken broth
2/3 cup evaporated milk or heavy whipping cream


  1. Prepare 24 meatballs according to the instructions on the package.
  2. In a saucepan over medium heat, melt the butter. Stir in flour, thyme, salt and pepper until smooth. Gradually add broth and evaporated milk. Bring to boil; cook and stir for 2 minutes or until thickened.
  3. Top meatballs with sauce.
By using prepared meatballs for this dinner, it makes for an easy romantic dinner for two, so you can spend more time with each other. Sometimes it's easier to have canned evaporated milk on hand rather than fresh cream, but either will work.

Now if you have the time and want to make your own meatballs for your romantic dinner at home, here's how to do it:

Ingredients:

1 egg
1/4 cup milk
1 teaspoon Worcestershire sauce
2 tablespoons ketchup
3/4 cups quick oats
1/4 cup onion, finely chopped
1 teaspoon salt
1/4 tsp pepper
1 1/2 lbs ground beef
3 tablespoons flour
  1. To make these easy meatballs, just combine the first 8 ingredients in a bowl and then combine with ground beef.
  2. Shape into balls that are about 1 1/2 inches in diameter. Roll in flour. 
  3. Place 1 inch apart on a baking. Bake at 400 degrees F for 12 to 15 minutes (till they're no longer pink inside).
  4. While baking, prepare the sauce.

Steamed Green Beans with Brown Sugar

If you're looking for a recipe for steamed green beans, this is an easy one.

Ingredients:

4–6 cups fresh or frozen green beans
1–2 tablespoons brown sugar
1/2–1 tablespoon butter
salt and pepper to taste


  1. Heat 10-inch skillet over medium heat. Place green beans in pan with a little water and cover. Steam the green beans for 8–12 minutes (depending on your preference for doneness).
  2. To stop the cooking process, add cool water to the green beans.
  3. Drain the water from the beans and set aside.
  4. Just before sitting down to the table (about 5 minutes) put the beans, the sugar, and the butter in a saute pan and saute them for 3-4 minutes.
  5. Add salt and pepper to taste. Serve immediately and enjoy.
Now it might sound weird to have pepper with brown sugar, but trust me, these are divine. They are similar to the beans you can order at Outback Restaurant (one of my favorite places to eat out). So if you're looking for easy romantic meals, give this one a shot.

And that's it! This is one of the easiest romantic dinner recipe ideas I've found (especially if you used prepared meatballs), and it's also delicious. And you don't have to reserve this meal to meals just for two either. This is a great meal for the whole family as well and my boys loved it :D.

What do you and your sweetheart do for your romantic dinners at home? I'd love to hear them!

Tuesday, October 18, 2016

Vacuums: Canister or Upright? Bagged or Bagless?

This week I'm going to be talking about vacuums, carpet cleaners and other topics related to carpet care. Today I thought I talk about what to look for in a new vacuum.

I used to own this Bosch canister vacuum
So last August, we moved from Utah to Washington so we could live closer to family. As we were getting packed up and ready, our vacuum died after 5 years of use. What bugged me the most about it dying though was the fact that it was just a part within the vacuum that no longer worked and if I could have opened it up to replace it, it probably would've lasted a few more years. But the manufacturers of the vacuum created it so there was no way to get the cover off of the head. There were no screws or anything as far as I could tell. I don't even know if I could have taken it to a certified vacuum repair shop to have it fixed because I didn't see how it could have been repaired. Typical of our throwaway society right? I hate that!

So I borrowed a friend's vacuum to get our place ready for moving and once I got settled into our new place, we decided to look for a new vacuum.

Canister or Upright?


Upright vacuum from Bissell
The first thing to consider is whether you want a canister vacuum or an upright. We really like our canister vacuum for the most part because the head was so small, it was able to get underneath furniture like the couch and beds so we didn't have to move furniture in order to clean underneath. It also makes vacuuming the stairs really easy and you were only pushing a light head back and forth instead of the entire heavy vacuum.

However, when I started researching vacuums, I discovered something about canisters. In order for them to work as well an upright, you need to have the motor that's in the body and a separate motor in the canister head. Otherwise, the head is using air to turn the rug beater and it's not going to have as much power as an upright vacuum. Because of this, the less expensive canisters are really made to work with carpets that have no pile whatsoever (which isn't very common for homes).

Obviously having two motors costs more, so in order to get a good canister vacuum that will do as good of a job as uprights, you're looking at paying $100 to $300 more than for a comparable upright. Something you'll have to consider if you decide you want an upright.

Bagged or Bagless?


Bagless upright vacuum by Panasonic
The next thing you'll have to consider when purchasing a vacuum is whether you want to go with a bagged vacuum or a bagless vacuum. Bagless vacuums seem ideal. You no longer have to pay for bags, which can be expensive. Instead just dump the dirt into the garbage when you're done vacuuming. There is a hidden cost to these bagged vacuums, though — the filters. Sometimes you don't think about the fact that many bagless vacuums have filters that have to be replaced every so often and can easily cost as much as vacuum bags.

Bagged vacuums come with bags. Many consumers try to buy off brand bags for their vacuums, but this isn't always wise. Branded bags are usually made using cotton and paper that is designed to trap particles so they don't escape when you remove the bags from the vacuum. These thick, 3-ply bags trap the dirt and dust particles so you can remove them cleanly. However, off brand bags often just use paper and have small holes in them allowing the smaller particles to escape releasing them back into the air to settle on the floor once again. If you're allergic to dust, it's especially important to buy the name brand vacuum bags.

So when it comes to vacuums, there are lots of decisions? Do you want to have a vacuum that is light and easy to push around? That's easy to clean stairs or can easily be transported upstairs and downstairs? Are you willing to put in an investment into your vacuum or would you rather pay less and go with a middle-of-the line vacuum?

Tomorrow I'll tell you which vacuum I chose and give you a review on it. In the meantime, tell me which vacuum you use. Do you love it or hate it?

Wednesday, October 12, 2016

Vacuums: Review of the Dyson DC40 Animal Upright Vacuum

So I'm sure you're dying to know (and I've made you wait in anticipation long enough). So what vacuum did I end up buying? I went with the Dyson DC40. Let's go over why I picked it and then I'll talk about the what I like and what I don't.

Why I Chose the Dyson DC40 Animal Upright Vacuum

Here is why I chose the DC40:
  • Got it at Costco, which has a great return policy and they had it for $100 off.
  • Though it's an upright, it's light and you can easily maneuver it around furniture.
  • It's bagless with washable filters, so you don't have to replace either bags or filters on it. 
  • You can easily take it apart to clean the rug beater (have I mentioned I have long hair?).

What I Like about the DC40 Animal Upright Vacuum

For the most part I do like this machine. Here are some of the highlights:
  • To release the cord, you just flip the cord minder down and then pull it off. 
  • It's really easy to dump the dust that's in the dust bin into the garbage (my one-year-old proved this by doing it himself ... all over the newly vacuumed carpet).
  • The dust bin opens at the bottom, so you're not taking it and turning it upside down to dump it (which I think would cause more of a mess).
  • It's light and easy to push around and get around furniture.
  • It has powerful suction to really clean the carpet.
  • And, as I mentioned, it's easy to take it apart to clean or to take out filters and such. 

Here's What I Don't Like about the Dyson DC40 Animal Upright Vacuum

Though it's a great vacuum, there are some things I would like to see improved:
  • Though the hose has really good suction, it's also really awkward to use. Half of it is a flexible hose and half is a stiff hose, and the stiff hose just seems to long and you can't take it off to use the vacuum without it.
  • The head doesn't go under the furniture. It's those days I wish I still had a canister.
  • It doesn't seem to work as well on hardwood floors. OK, so I don't have hardwood floors, but I noticed a lot of reviews mention this, so I figured I'd add it to the list in case you do. I really think this vacuum was made for carpeted floors (I haven't used it for the kitchen or anything so I couldn't say).

Just the Facts:

Store: Costco
Price: $400
Date Purchased: August 2012
Rating: 4/5
Recommended: Overall, yes, but it's an expensive vacuum. It's possible there are cheaper vacuums that work as well.

\

Friday, April 12, 2013

5 Favorite Things of the Week - 4/12/13

This week has flown by and I haven't gotten nearly as much done as I should have by now. I guess that's just part of being a mom, right? Well, here are my favorite things from this week.
  1. Book Bomb success. This week an author I know, Dave Wolverton (who writes under the pseudonym David Farland), had a tragedy in his family. His son was in an accident that caused severe brain trauma. There are sites set up to raise money to pay for medical bills which could easily reach in the millions. On Wednesday, a book bomb was held for Dave's books to help raise money. Another benefit of a book bomb is it raises the book's status so it's more visible on sites like Amazon and Barnes and Noble. By the end, the book, Nightingale, reached #1 in contemporary fantasy for both books and ebooks, #2 for paranormal fantasy books and #84 overall for paid ebooks on Amazon. It's pretty amazing. If you are planning on buying things from Amazon, consider going to the book bomb link and then clicking on the link there for the book. After doing so, anything you buy on Amazon after will also pay back a little money to the Wolvertons. I'm so glad it was a success!
  2. School's back in session! This week Alex headed back to preschool after a week off for spring break. He was excited to go back and I was excited to spend some one-on-one time with Micah in the morning and get some stuff done.
  3. Fresh fruits and veggies. I've been trying to avoid going to the groceries the last couple weeks because we've been going over our monthly budget for food, but yesterday I headed to the store and got lots of fresh produce, like apples, bananas, strawberries, oranges, onions, sweet peppers, broccoli and spinach. I love having these fresh fruits and veggies around to make smoothies with (and more!). Despite having a completely loaded shopping cart, I also only spent $130 on food. Woohoo! 
  4. New smoothie. This week I discovered a killer smoothie combination: peanut butter, bananas and spinach. I'll be telling you all about it next week. Let's just say it's delicious and I think with the protein from the peanut butter, it works as a meal (I know it kept me full from lunch all the way till dinner, no cravings).
  5. Easter with family. Yes, this is a little late, but I missed my weekly post after Easter. We had a great time visiting with my hubby's parents over Easter. They also brought treats for us and the boys. I love getting to spend time with family :D.
Have a happy weekend!

Tuesday, April 2, 2013

Activities for Preschoolers: Scissor Skills

This year, my son is part of the Head Start program, so every Monday through Thursday morning, he has school from 8 a.m. to 11:30 a.m. It's great because he's learning a lot, not just about typical school stuff (ABCs, writing, numbers, etc.) but he's also learning other skills. They talk about what to do if you're angry, how to wait your turn, sharing, eating healthy, etc. They also serve the kids breakfast and lunch, which is awesome because that's 8 meals a week that I don't have to worry about feeding Alex. It's also great because that's 14 hours a week where he's out of the house and I can get more done without worrying about IBS — I'm Bored Syndrome.

But this week is Spring Break, which means Alex is home all day every day. This is especially hard for me since I'm a work-at-home mom, so it's not like I can just take time off and spend it with him. Still, I am trying to use the time to be with him more and not work the whole day.

Getting Ready for Kindergarten by Teaching Your Preschooler to Use Scissors


Before Alex started at Head Start, I didn't even think about working with him on using scissors. I taught him his letters, shapes, numbers and counting, animals, etc., but scissors never entered into the equation. Then last week the teacher said to me right before leaving on the last day, "Alex really needs help on using scissors. Maybe you could work with him on it over the break." I was thinking, What? Why? Why would being able to use scissors be important? Luckily for me, there's the Internet.

Why Kids Need to Learn to Use Scissors 

  • Cutting with scissors builds muscles in the hands needed for fine motor skills like writing and painting — anything that requires a grip. 
  • It helps strengthen hand-eye coordination, so your child is more coordinated (like for throwing balls and such). 
  • It works on bilateral coordination — two sides of the body work together (for example, holding the paper with one hand while cutting with the other).

Ways to Practice Using Scissors

There are many ways to practice using scissors with your preschooler. The important thing is to not stress about it too much and go with what you're up to doing that day. Here are some ideas:
  • Draw shapes on a piece of paper and then have your preschooler cut them out. After, you can decorate the shapes together. We just used scrap paper I had in the recycles bin for this.
  • Print out some worksheets, like those found at Kids Learning Station, and have your child cut along the line.
  • Create an art project that requires cutting, such as this one from Make and Takes. That way it's fun and your preschooler won't realize that it's practice. If you need inspiration, there are lots of ideas on Pinterest.

When Should You Start Teaching Your Child to Cut with Scissors?

Did you know that you should start having children use scissors as early as 2? I had no idea, but I suspect it's why Alex is so far behind in writing, so it's definitely something we'll be working on, and I'll start working with MW on it sometime in the next year. Here are the recommendations for when you should teach your child what:

  • 2 years old: Use scissors to snip the ends off of pieces of paper
  • 2.5 years old: Cut through a piece of paper from end to end
  • 3 to 3.5 years old: cut along a line that's 1/2 inch thick (should be able to stay within that line without cutting outside of it more than 3 times)
  • 3.5 to 4 years old: cut out a circle (should be able to stay close to the line for at least 3/4 of the circle)
  • 4.5 to 5 years old: cut out a square
It's also recommended to use a variety of thicknesses, starting with thick paper and working towards thinner paper (which is harder). Materials would include play dough, thick folders, construction paper, regular paper, and then tissue paper.

When choosing scissors, find ones that allow for stability, such as these children's scissors, especially the ones on top from Fiskars. These allow stability, making cutting easier, and they have blunt ends that are rounded.

Alternative Activities to Using Scissors

If your child doesn't have the strength yet to use scissors, there are other activities they can do that use the same muscles so they can build up to using scissors.
  • Use tongs to pick up objects and put them in a bucket.
  • Cut out pieces of paper and have your child use tweezers to pick up a piece of paper and drop it into a box.
  • Have child use a single hole puncher to punch holes in paper.
  • Create a race where your child has to pick up an object with tongs and carry it to the other side of the room and drop the object into a tub.
So if you're looking for ways to help your preschooler prepare for kindergarten, don't forget to work on those scissoring skills! What things are you doing to help your preschooler prepare for kindergarten? I'd love to hear it!

Friday, March 29, 2013

7 Reasons Why You Should Be Reading E-Books


So hopefully, I haven't totally confused you with whether or not you should get an e-reader, but I wanted to talk about whether I recommend e-readers in general. I don't know if I recommend an e-book reader per se (it really depends on your situation and your preferences), but I definitely recommend e-books. 

Whether you read them on an ebook reader or on a tablet using an app, I do recommend you getting into the world of electronic books. Here's why:

E-books are often cheaper

First I'd like to say that people seem to have a misconception and believe that e-books should be dirt cheap or they should be free just because you're not buying a physical product. Understand though that the cost of printing and shipping a book is only a small fraction of the cost of producing a book. That said, e-books do tend to be cheaper, especially if the book has been out for a year or more. Once the cost of producing a book has been covered, publishers have more leeway in offering a discount on e-books since they can produce an infinite amount without costing more.

Not only that, but you don't have to pay to have the book shipped and books are instantly delivered to your e-reader or other device, so no waiting for it to reach you. You want to read a new book, you can within seconds.

E-books don't take up space

This last summer I moved two states away and let me tell you, I got rid of a lot of books. You can't sell used books very easily (unless they're expensive, up-to-date text books). I had a bunch at my yard sale and I probably sold five of them, mostly kids' books. They're heavy and once you've read them, you might not read them ever again (or you might read them only every 5 years and in the meantime they're taking up space). E-books on the other hand take up no space, you can have as many as you want (especially with cloud storage) and they weigh nothing.

You can borrow e-books from libraries

Libraries are starting to have e-books as part of their inventory. To borrow one, you just have to have a membership to that library. You don't have to go to the library to get a book; you just need an internet connection. Just like with the regular books, you may have to wait in line till a book is available and the selection may be limited, but there are no worries about losing the book or forgetting to return it and paying a late fee. You also don't have to worry about paying for a new book after your toddler decided to turn it into an art project. 

You can borrow e-books from friends

Just like with regular books, you can borrow books from friends. Unfortunately, there are some restrictions. You can only borrow each book one time. Book lending periods are for 14 days, so only borrow a book when you know you want to read it. Publishers of the book also have to have the option of lending enabled, so not all books are able to be lent. Still, it's a great way to read a book your friend recommended to you, and you don't have to worry about forgetting to return it!

You can read ebooks on any device from practically anywhere

Did you know that you can get a program that allows you to read Amazon e-books from your computer? Yep, you can read them right on your desktop ... no e-reader required. There are apps for every mobile and tablet OS (as far as I'm aware) as well as Kindle. Not only that, but if you start reading a book on one device and then switch to another device, the Kindle app will remember where you left off and you can pick up from there on the next device (assuming you're connected to the Internet while you're reading, that is). You can go from reading on your computer to reading on your phone to reading on your table to reading on your e-reader. This makes it great if you were reading on your Kindle at home and then got stuck somewhere without it because you can just continue on your smart phone. Genius!

You can take the reader with you wherever you go

And unlike with real books, you don't have to worry about them being too heavy. By having your e-reader in your purse, you will always have something to do if you find yourself waiting for your car's oil to be changed or waiting at a doctor's office for an appointment.
This shows some of the books I'm borrowing along with The Da Vinci Code I got for free :)

You can get books for free

Despite what I said about how you shouldn't expect to get books for the fraction of the cost, books are still available for free. Typically, these books are ones by self-published authors who are looking to gain a readership, but that's not always the case. Another reason a book might be free is that it's the first book in the series and the publisher is trying to get more readers interested in the other books, and therefore buy them. I've even got big named books for free like The Da Vinci Code and Must Love Dogs. These books are typically not free for long, though, so check back to Amazon often to see what the deals are that day.
    So whether or not you've owned an e-reader in the past, dive into the world. If you don't have a lot to spend, start small with a Kindle Touch or something equivalent. For only $69, you really can't go wrong.

    *Hot* Insider's Tip


    Want an insider's tip. I know how you can keep a library e-book rental (or other rental for that matter whether you're borrowing a book from a friend or from Amazon) longer than the due date. Typically on the due date, the book will automatically be removed from your e-reader and you won't be able to read it again unless you borrow it again or buy it.

    However, if you turn off your Wi-Fi on your Touch, so it doesn't connect to the Internet, your book will stay on your Kindle till you connect again. (Shhh, don't tell Amazon we know this!) Of course, this could be problematic on a tablet, which pretty much has to connect to the Internet to function (i.e. there are certain apps that won't work without connecting), but on the Touch, the only reason you'd need to connect would be if you need to download another book onto the device. As long as you don't need to, you can disconnect it from Wi-Fi and finish reading your book. Once you're done, reconnect, say buy to the book, and get new books.

    Protecting Your Kindle


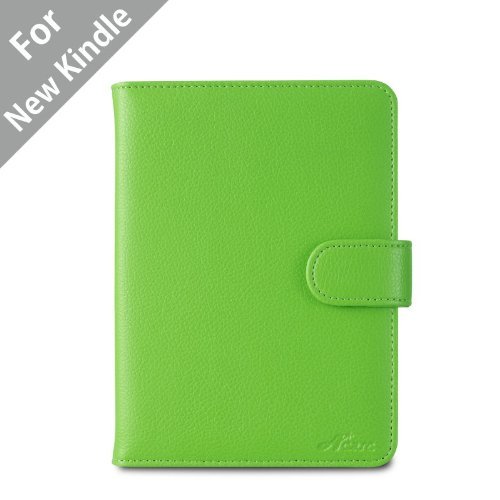
    And if you do end up getting either the Paperwhite or the Touch, I highly recommend this leather case. I got it for my Kindle and it's been great. Easy to open and close, good quality, and the Kindle fits perfectly. It comes in 8 colors and is only $9.45 to $13, so you really can't go wrong. With it on, I can just throw my Kindle in my purse and go without worrying about the screen getting scratched.

    Well, I hope you've enjoyed the series this week on e-readers and e-books. Let me know what you liked about the series and what you didn't :).

    I'd also love to hear about your experiences with e-readers and e-books. Do you have any tips or suggestions? Leave them in the comments.

    Wednesday, March 27, 2013

    E-Reader Series: Review of Kindle Touch from Amazon

    I've mentioned a couple times in the last couple weeks about how I used my downtime to read on my Kindle. As I've been using it more, things came to mind about what I like and what I don't like, so I figured I'd do a review about my Kindle Touch.

    What I Like about the Kindle Touch


    Let's start off with what I like about the Kindle Touch.

    It's easy to use. There are certain parts of the screen that do certain things. While reading a book, you touch the top to bring up the menu, the right side to go forward and the left side to go back. You can also swipe up and down to to move to the next chapter or previous chapter. 

    See definitions of words while you read.
    You can bring up the dictionary to find out what a word means. Unlike a regular book where you have to physically get out the dictionary or search online to find out the definition of a word, the Touch automatically comes with a dictionary preinstalled. To find out what a word means, just press down on the word for a couple seconds and let go. The definition will pop up in a little window. Click outside of the window to go back to reading.

    Battery life. Battery life on the Touch is long, like a month. No need to charge it every day or two like with tablets. 

    Read one-handed. Since the Touch is about the same size as a book (it's just a little smaller than 7-inch tablets), you can hold it in one hand to read. It also fits easily into purses, so you can easily take it with you wherever you go.

    Read in direct sunlight. This one was a big reason I chose the Kindle Touch over a tablet. Where tablet screens will get washed out in sunlight (such as reading at the park or on the beach), the screen on the Kindle Touch can be read in almost any light level. It's also easier on the eyes with the e-ink display.

    What I Don't Like about the Kindle Touch


    Though I like it overall, there are things I don't like about the Touch. 

    Can't read in no light or very low light. Just like a regular book, you can't read on the Touch if you don't have much light or any light. This typically isn't a problem, but every once in awhile it can be. This is what Paperwhite tries to eliminate. It's supposed to work in any light level from direct sunlight to no light. Of course it wasn't around when I got my Touch, or I'm sure I would have gotten it.

    Not very responsive. When you're reading a book and turning from one page to the next, it works great. However, trying to get to the home screen and searching around for books, it takes quite a lot of time to think about what it wants to do. This can get annoying if you're trying to organize your book collection or are browsing around trying to decide what to read. Luckily, it doesn't affect use of the Kindle too much.

    List of books. No book covers.
    Not high def screen. When you use the Kindle app on your tablet or smartphone and are browsing through your library, you see these beautiful book covers that help you find something you're looking for and help you decide what to read. On the Touch, all you see are book titles, which isn't always helpful in trying to find stuff. Obviously, the Touch can't give you beautiful color pictures, but if it had a faster processor, it could probably give you at least gray scale pictures of the books, which still might help you figure out what you want to read. You pretty much have to know what you're looking for or go onto your computer or other device to find what to read and then get it on your device. 

    It only comes with a charger cable that connects to your computer. This isn't huge deal because you can charge it, but if you've ever had a tablet, smartphone or other device, you know that it will charge a lot faster if it has a wall charger. You can a wall charger for your Kindle but it will cost extra ($20). 

    Operating system. I am not happy with the operating system on the Kindle at all. Besides being really slow, it's really kludgy. For example, sometimes I'll be searching for a book and will search for the title. It will bring up a search results that shows all the books with those words, including the book I want. So I tap on the title, but instead of taking me to the book, it just takes me to where in the book those words are found and I have to fumble around trying to find the beginning of the book.


    So am I happy with my Kindle? Would I choose it again if I did it all over again? Tune in tomorrow for a continuation of As the Kindle Turns ... I mean the continuation of my e-reader series ;).